After a few years of observing the kitchen habits of myself and others, I’ve decided to put together a little list that I think a lot of us could benefit from. This list briefly details 10 things that I believe will help make cooking less stressful and more enjoyable.
1. Use a cutting board.
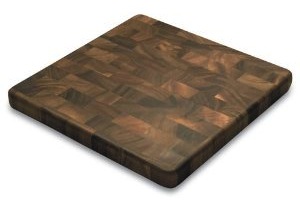 Cutting boards are one of those multi-purpose kitchen tools with which you can do all sorts of great stuff. You can cut on them, use them to hold hot things, hold them over your head, stand on them, cover pans with them, use them as a shield, use them for squashing things, attach wheels and skate on them, and the list goes on. Every parent, teenager, and child should have one. They’d never be
 board bored again (groan). Of course their main purpose is a protection for both your counter and your knife when cutting. Of course I’m kidding about the standing on them part.
Keep a cutting board readily accessible so you’re never tempted to cut on the counter top. Even the most careful cooks wind up with dings in their counter and so will you (even if you say you won’t). Most counter surfaces will also dull the knife blade. I prefer wood cutting boards. Wood looks great in the kitchen, it’s soft enough to not dull your blades quickly, and it has large pores that more easily trap bacteria (when the wood dries, the trapped bacteria dies).
2. Keep your knives sharp
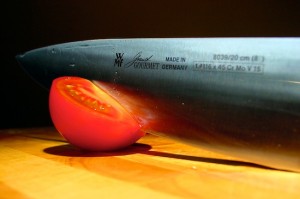 You’re probably sick of hearing this, but it’s still a widespread problem: Keep your knives sharp! I try (sometimes I forget) to run mine across the sharpening rod a few times before putting them away each time. When you come to my house, you’re guaranteed a sharp knife. I also can’t remember the last time someone cut their hand or finger on a knife at my house. Knock on wood, I’ll probably lose a finger today after I write this.
Believe me when I say it’s easier to keep your knives sharp then to let them become dull and then spend two hours in a grand knife sharpening session. You can spend twenty seconds now or two hours later. Aside from your fingers, a knife is the most important kitchen tool, and I hypothesize that a person takes care of their kitchen only as well as they take care of their knives. You can buy all sorts of knife-sharpening tools from steals to machines to hand-held thingamajigs. If you learn to use a sharpening steal, though, I guarantee it will become your common sharpening method of choice.
P.S. If you’re not sure how to sharpen your knives, I recently reviewed a 250 page book on that subject. You should read it, it was awesome.
3. Clean before you cook.
 This is an area where I struggle and my wife excels. I understand its value and try to do it, but sometimes I just want to start cooking. The crazy thing, though, is that I’ve noticed a significant improvement in my organization and mood when I’m cooking in an already clean kitchen. For me that means putting away all the pens, pencils, notebooks, gadgets, letters, and wiping clean the counter and stove top. It also means cleaning, drying, and putting away the dishes.
Trying to work in a messy kitchen invites disaster: It affects your ability to think clearly, impacts your efficiency, and creates an even greater mess. Two situations in particular stand out as times when you want a clean kitchen. The first is when handling raw meat, especially chicken. Murphy’s law states that if you’re cutting, seasoning, or pounding raw meat it will splash on to something it shouldn’t. Minimize that ‘shouldn’t’ by keeping the surrounding area clean. The second is when working with hot pans. Have you ever pulled a hot pan off the stove top and turned to place it somewhere else, only to find that there’s no room anywhere? You end up hurriedly brushing something aside with one hand (dangerous!) or calling for help. I’ve done that, and it’s no fun. As it goes a plastic bag is usually in the way, and that’s the last thing you want near your hot pans. Clean before you cook.
4. Hand wash valuables and woods.
Thank goodness for dishwashers. I’ve lived without a working dishwasher numerous times, and it felt like I was washing dishes 24/7. I know what you’re saying… even with a dishwasher, it feels like you’re washing dishes 24/7. I can’t argue with that. Even as convenient as our beloved dishwashers are, there are still a few things you should absolutely be washing by hand: valuable or specialty dishes and anything containing wood.
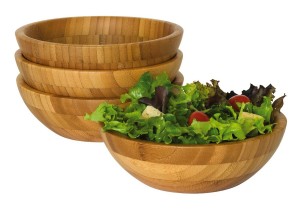 Valuables is a loose term that changes depending on with whom you’re talking. Things that I would consider valuable: fine dinnerware (like china and crystal), special metals and materials like silver, bronze, copper, brass, and the occasional kryptonite. Also valuable are your knives, slow cooker interiors, cast iron pots and pans, stoneware, and so forth. These are the types of items that you don’t want to clank against other dishes during washing cycles or to wind up spotted, rusted, stained or otherwise ruined from an overstocked dishwasher, crappy dishwasher soap, or too much heat.
It should go without saying, but never wash anything with wood on it in the dishwasher, even if it claims to be “dishwasher safe.” You’ll shorten a wooden kitchen tool’s lifespan every time it undergoes a dishwashing cycle. The heat and humidity during a washing cycle causes the wood to expand rapidly and glues (if present) to losen. The rapid expansion will remove any finishes and sometimes crack the wood. I had a visitor once put my new wood-handled knife in the dishwasher. It came out a different knife, and I cried on the inside. I might have cried on the outside too. I don’t quite remember.
5. Metal utensils and non-stick pans are not friends.
I covered this in an earlier article (we’re talking, waaay earlier) about non-stick pans, but it’s worth mentioning again. Non-stick pans are finicky and can be ruined by the simplest things, such as using too high a heat or dishwashers. But if I had to guess, I’d say most non-stick kitchen pans are ruined by metal scrapers and knives.
Most baking dishes come in a non-stick variation these days: muffin tins, skillets, cake pans, cookie sheets, yaddi-yadda, you name it. They’re great to have around until their non-stick wears off, then they’re a royal pain in the butt, and you might as well be cooking with velcro and a gallon of oil. Instead of a metal spatula (turner), whisk, and knife, use their silicon, plastic, or wood cousins. I’ve got a non-stick skillet, 9×11 baking pan, cake pan(s), and a muffin pan that I’ve used for 8 years, and they’re still going strong. With just a little TLC, you can do the same.
6. Compartmentalize your staples.
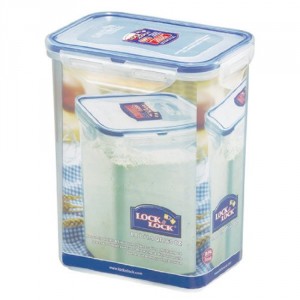 One of the easiest ways to keep your kitchen clean and organized is to use bins for your key ingredients. I’m talking flour, white sugar, brown sugar, cornmeal, salt, and so on. I’ve used the larger containers from Lock & Lock (affiliate link) for 3+ years and absolutely love them.
Keeping the ingredients that you use most often in bins like these make for easy stacking, quick organizing, and fewer spill accidents. This has been particularly useful for flour and sugar. If you get a good container, even if it does tip over, it won’t spill out. I also keep two larger tubs around. One is for miscellaneous baking items like sesame seeds, extra flour and sugar, etc., and the other is for making sweets, and holds things like chocolate chips, marshmallows, candies in bulk, and coconut flakes.
7. Keep a grease jar.
Grease jars are essential in the home kitchen. As you are probably well aware, oils and grease do not play well with water; therefore, dumping your grease down the drain is a no-no. If you’re guilty of this you should slap the back of your hand, twice. Grease will line your pipes and clog them up. Grease jar to the rescue! Thank goodness for simple solutions.
In my opinion, the best grease jars are the ones you don’t have to pay for (cheap skate), so we reuse the glass pickle and spaghetti sauce jars. Once one is full, we throw it away and start a new one. Keep it under the kitchen sink so you always know where it is and so that it doesn’t scare the neighbors when they come over and see it on your countertop. (You can always tell them it’s another one of your “creations,” and to have a sip.)
8. Experiment.
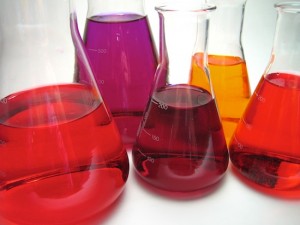 When I was a biology and chemistry student, we’d spend hours each week in our laboratories combining chemicals, lighting gummy bears on fire, and following lab manuals. If you followed the directions exactly, everyone in the room would get the same result. Experimentation was for the “experts.” BORING!
Experimentation is vital to learning and creation, and I love it. The kitchen is the perfect place for experimenting. The ingredients aren’t deadly—welcome to chemistry—and if you make something that turns your stomach, you can always give it to the cat. (And you’ve always thought the phrase “curiosity killed the cat” referred to the cat’s curiosity.)
Cooking becomes 10x more fun, and a lot less stressful, when you approach it from an experimentation point of view. It’s totally okay to make a meal now and again that doesn’t turn out. It’ll build your character and the character of those who eat it. The important thing is that you learn how each ingredient affects the final dish. The more you experiment and pay attention, the more awesome your cooking will become.
If you’re not sure where to start, find a recipe that you’ve made a few times so you understand wheat it usually turns out like, then start removing/adding to it one ingredient at a time. Chances are you may find you like it better some other way. My recent Holiday Squares post is an example of that.
9. Set aside leftovers before you eat.
I’ve lost count of how many times I’ve said, “I need some of this for leftovers,” and then proceeded to eat it everything. By setting aside a portion of the meal before bringing it to the table, you’re making sure you have some left for tomorrow’s lunch and it also helps portion control. Even though I’m still working on this one, I’m always grateful when I have set some aside.
10. Taste your food as you go.
That’s right, I’m saying that it’s O.K. to take a sip of the soup or pudding as it’s cooking. It’s also okay to take a snitch of that cookie batter; just be sure some of it actually makes it into the oven.
I used to think it a bad practice to snitch before the meal was ready, but I’ve come to realize that snitching, or “taste testing,” is essential if you want to perfect your recipes and meals. All too often is a good meal ruined because it was over- or under-seasoned or even missing an entire flavor like onion or citrus.
As you cook your food, tasting will develop your cooking intuitions and help you more accurately achieve the flavors you’re looking for. I’m reminded of how important tasting as you go is when I cook my kids. They literally want to taste everything. They taste each ingredient individually and then put together. A few of my meals have been saved by my kids saying “yucky” at certain points along the way. As with all things in the kitchen, if you’re letting your kids taste as you go, be sure to use some parental discretion and don’t let them taste something that will harm them.
What is it for you that makes cooking less stressful? Please share in the comments below. If you found this post helpful, please share it with your friends.
Recently my kitchen has become an unhappy place for other members of my family. I love to slice up onions both cooked and raw, yesterday I sliced up a red onion and the odor was far more pungent than any other onion that I had sliced before. My question is there a type of onion with less of an odor?
Yellow, White or Red.
Gotta’ love how onions linger. Slicing with the grain of an onion will help contain the scent as it will break through fewer cells. All of them are fairly pungent, but the sweet onions have less sulfates which makes them more approachable. Of the three you listed, the red onion will have a more mild odor.
If you haven’t read through this short onion article, you might find some additional tips there and in the comments: https://thecookingdish.com/0330/the-difference-between-yellow-onions-white-onions-and-red-onions